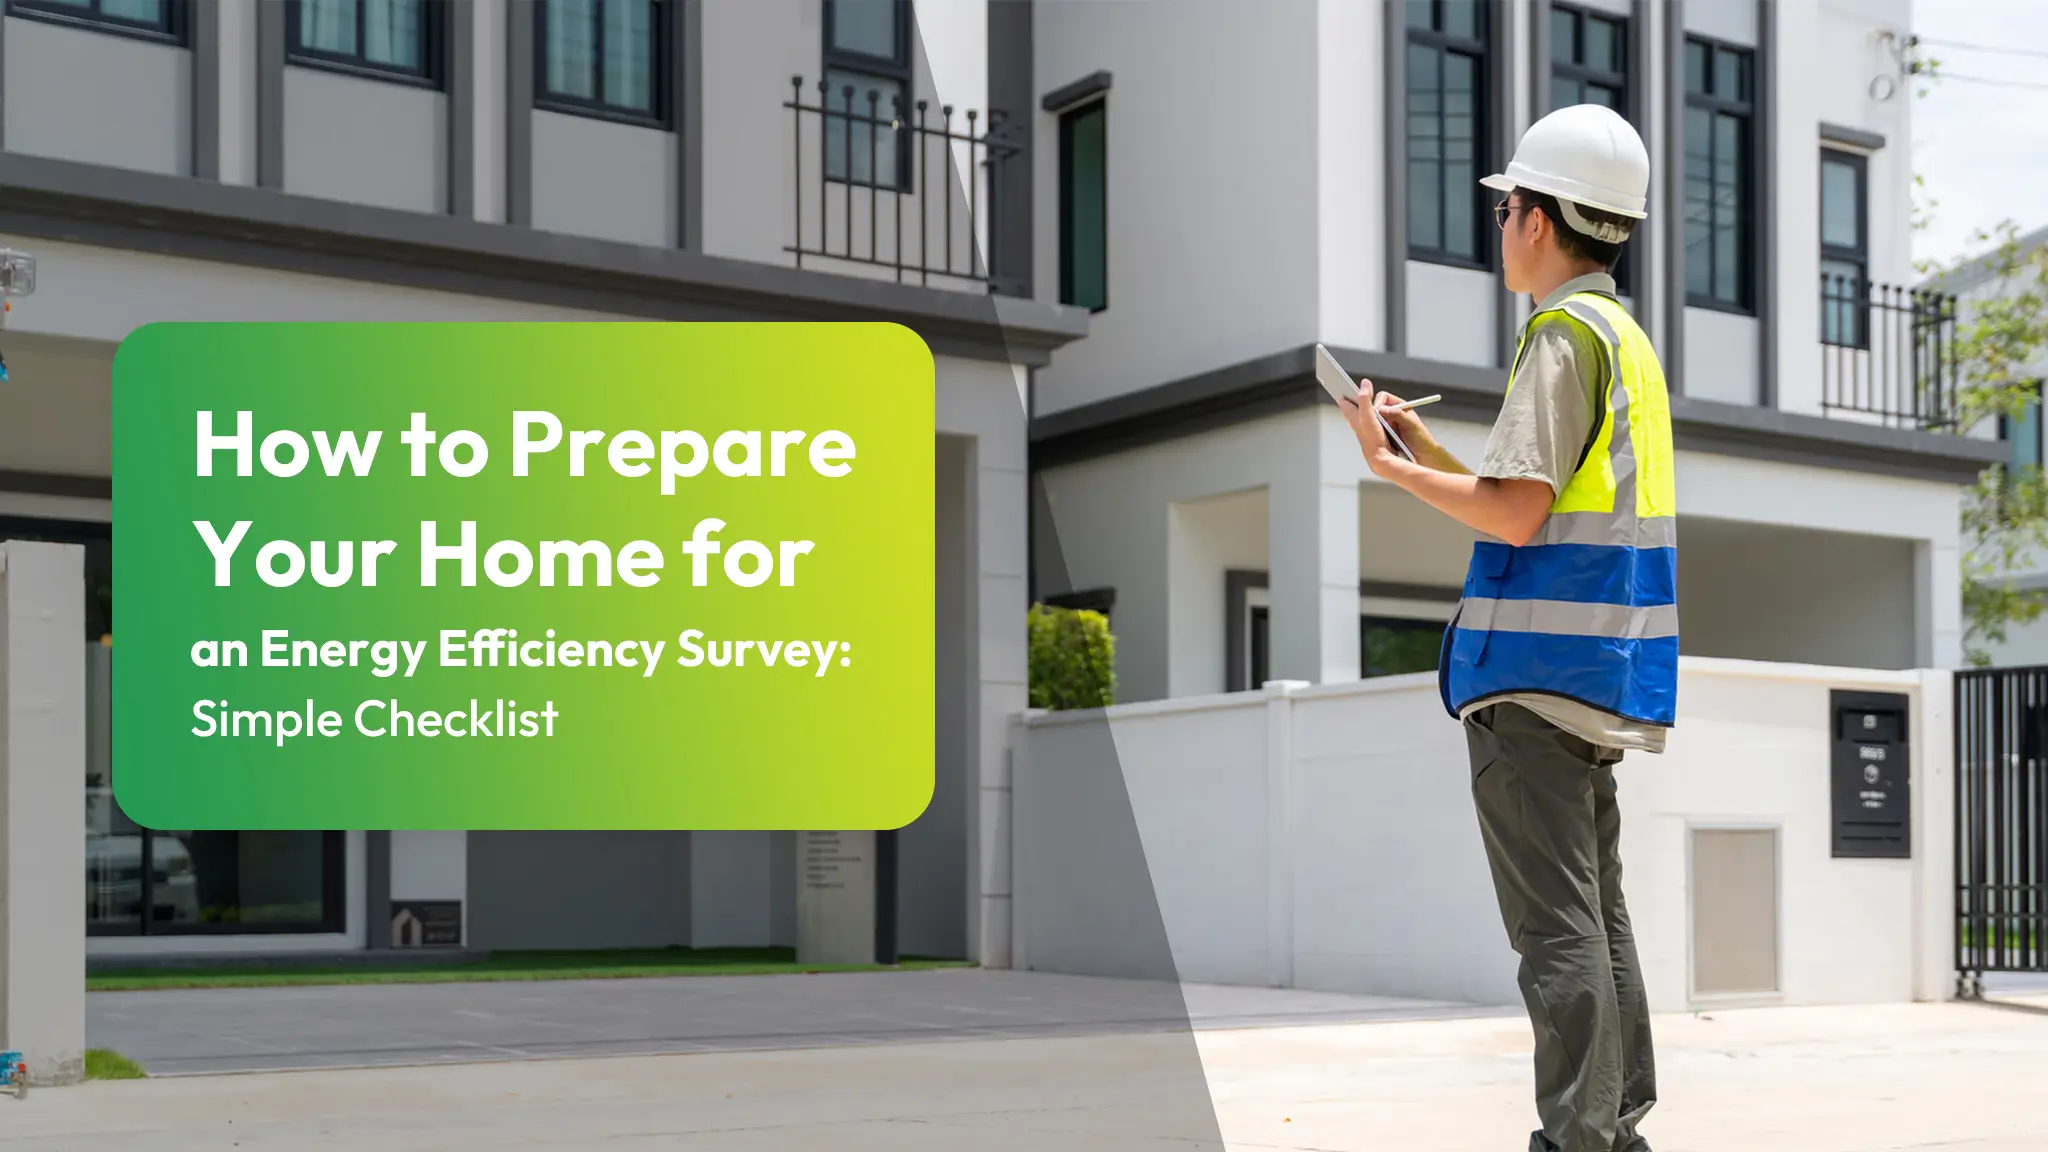
To prepare a UK home for an energy efficiency survey, the owner should clear access to all rooms, loft and roof spaces, and guarantee internal doors and hatches open fully. Heating controls, boiler labels and smart hubs should be visible and powered. They should gather energy bills, records of insulation or upgrades, and note any damp, condensation or ventilation issues. The assessor will then inspect building fabric, systems and improvements, and the next sections explain each step in more detail.
Key Takeaways
- Clear access to all rooms, loft hatches, and heating controls so the assessor can safely inspect key areas without obstruction.
- Gather documentation: insulation and upgrade records, boiler and heating details, and at least 12 months of energy bills showing kWh use and tariffs.
- Make loft and roof spaces accessible by moving stored items from the hatch, providing safe ladder access, and improving lighting where possible.
- Check ventilation and note any damp, mould, or condensation issues, including where and when they occur, to discuss during the survey.
- List all past home improvements affecting insulation, heating, windows, and renewables, including dates, contractors, and any invoices or warranties.
Table of Contents
What is an Energy Efficiency Survey?
An energy efficiency survey in the UK is a structured assessment of how effectively a home uses energy, identifying where heat is lost, where systems underperform, and where savings can be made. It is usually carried out by an accredited assessor who follows government‑recognised methods.
The survey typically feeds into an Energy Performance Certificate (EPC) or a similar report. The assessor records construction details, insulation levels, glazing type, heating and hot‑water systems, and fixed lighting. They also note ventilation features and any renewable technologies, such as solar panels or heat pumps.
Using this information, the survey produces energy ratings, estimated running costs, and tailored recommendations. These help homeowners understand current performance and see which upgrades offer the greatest practical and financial benefit. Here are the best energy improvements options.
Check Access to All Main Rooms
Before the assessor arrives, access to every main room needs to be clear and unobstructed so the survey can be completed in one visit. This includes living rooms, bedrooms, kitchens, bathrooms, and any regularly used reception rooms. The assessor must be able to move around safely and see walls, windows, radiators, and heating controls.
Furniture does not need to be rearranged completely, but narrow gaps, blocked doorways, and trip hazards should be dealt with. Internal doors should open fully where possible, and keys for any locked rooms should be easy to find. If a room is used for storage, walkways should still be available. When every main room is accessible, the assessor can collect accurate information and avoid delays or repeat appointments.
Clear Access to the Loft and Roof Space
Many energy efficiency surveys require the assessor to inspect the loft or roof space, so safe, clear access is essential. The assessor needs to view insulation depth, roof structure, and any visible ventilation. If they cannot reach the area safely, they may have to record assumptions, which can reduce the accuracy of the survey.
Homeowners benefit from preparing this space in advance. Common tasks include moving stored items away from the hatch, improving lighting, and ensuring ladders are stable and in good condition. Pets and children should be kept clear during the visit to avoid distractions and hazards.
| Task | Why it matters |
| Clear items from hatch area | Prevents trips and allows ladder positioning |
| Provide a safe ladder | Enables secure, confident access |
| Improve lighting if possible | Helps accurate visual checks |
| Move fragile storage boxes | Reduces risk of damage |
| Inform assessor of weak boards | Supports safer movement in the loft |
Make Heating Controls Easy to Inspect
Several key elements of a home’s heating system must be visible for the assessor to complete an accurate energy efficiency survey. They will look for how well the household can control temperatures in different areas and at different times. To help, the homeowner should clear obstructions and make sure controls are easy to reach and read.
Key actions typically include:
- Make sure wall thermostats are not hidden behind furniture, curtains, or decorations.
- Expose any individual room thermostats or smart radiator valves.
- Make programmers, timers, and smart heating hubs clearly accessible and powered.
- Check that control screens are readable and, where possible, set to “auto” rather than “off.”
- Keep any portable controls or remotes in a predictable, visible place for the visit.
Explore the common reasons homes lose heat in the UK and how to fix them.
Prepare Boiler and Heating System Details
Organising key information about the boiler and wider heating system enables the assessor to identify equipment correctly and judge its efficiency. Homeowners should locate the boiler’s make, model, fuel type, and installation year, using manuals, service stickers, or photos of the data plate.
They may also gather any documentation on past servicing, repairs, and upgrades, including receipts for new pumps, insulation on pipes, or system flushes. If there is a hot water cylinder, its size, insulation type, and thermostat setting should be noted. The assessor benefits when system layout is clear, so occupants can briefly describe whether the heating is combi, system, or regular, and mention any secondary heaters, such as gas fires or storage heaters, present in the property.
Check Windows, Doors and Draught Areas
With boiler and heating system information prepared, attention can shift to the building’s openings, where significant heat loss often occurs. Before the survey, a homeowner benefits from briefly checking windows, external doors, and obvious draught points so the assessor can quickly see current conditions.
They can move systematically through the property, noting where cold air enters, frames are damaged, or seals have failed. Simple observations are enough; no specialist tools are required. Key checks include:
- Standing near windows and doors to feel for noticeable cold draughts
- Looking for visible gaps around frames, sills, and thresholds
- Checking whether window and door seals or gaskets are cracked or missing
- Observing condensation between glazing panes, indicating failed seals
- Listing any particularly cold rooms linked to leaky openings
Gather Insulation and Upgrade Records
Collecting insulation and upgrade records before an energy efficiency survey allows the assessor to understand exactly what improvements have already been made and when. Having this information ready helps them avoid guesswork and base their recommendations on verified details rather than assumptions.
Homeowners should gather receipts, invoices, warranties, and installer certificates for items such as loft, cavity wall, internal or external wall insulation, and upgraded hot‑water cylinders or pipe lagging. Records of low‑energy lighting upgrades, smart heating controls, and heating system replacements are also useful. Dates and product specifications matter, so keeping notes of installation years and materials (for example, mineral wool depth in the loft) is helpful. Storing these documents in a single, clearly labelled folder guarantees they can be quickly shown during the visit.
Provide Recent Energy Bills If Available
Once physical upgrade records are in order, recent gas and electricity bills become the next key source of information for an energy efficiency survey. Assessors use these documents to compare theoretical performance with real-world energy use, helping them spot unusual patterns such as spikes in winter consumption or high baseload usage.
Homeowners are typically encouraged to gather at least 12 months of bills, printed or digital. Essential details include:
- Total kWh used for gas and electricity in each billing period
- Standing charges and unit rates to show cost structure
- Tariff type (fixed, variable, time-of-use, or special plans)
- Any notes about estimated versus actual meter readings
- Evidence of recent supplier changes or tariff switches
Check Ventilation Before the Survey
A crucial part of preparing for an energy efficiency survey is checking that the home’s ventilation is working as intended, neither starved of fresh air nor excessively draughty. Before the assessor arrives, the householder can walk through each room and note how air is supplied and removed.
They may check whether trickle vents on windows open and close freely, and whether mechanical extract fans in kitchens and bathrooms operate, sound normal, and move air perceptibly. Any obvious blockages on vents or grilles, indoors or outdoors, should be gently cleared. If there are controllable vents in walls, chimneys, or floors, their typical settings can be recorded. This helps the surveyor understand everyday ventilation patterns and judge whether existing systems are appropriately used.
Note Any Damp or Condensation Issues
Before the survey, the householder can walk through the property and systematically note any signs of damp or condensation, as these often reveal underlying energy performance issues. Observations should be factual and room‑by‑room so the assessor can quickly connect symptoms with causes such as poor insulation or cold bridging.
They may record:
- Water staining, peeling paint, or blistering plaster on walls and ceilings
- Black or green mould patches, especially around windows, corners, and skirting boards
- Persistent condensation on glazing, frames, or mirrors, particularly in mornings
- Musty smells in built‑in cupboards, behind furniture, or under stairs
- Damp patches near external walls, chimneys, or at the junction of floors and walls
Photographs and brief notes (location, size, frequency) help the surveyor evaluate moisture problems alongside energy‑loss patterns.
Prepare Details of Past Home Improvements
Gathering clear information about past home improvements allows the energy assessor to understand how the property has evolved and which elements already meet modern standards. The homeowner should list any upgrades affecting insulation, heating, hot water, glazing, roofing, and ventilation, noting approximate dates and contractors where possible.
They may gather documents such as invoices, warranties, building control certificates, and product datasheets for items like boilers, windows, cavity-wall insulation, or solar panels. Even if paperwork is incomplete, brief written notes can still be useful.
Organizing this information in a simple folder or digital file, grouped by improvement type, helps the assessor quickly confirm what has been installed. Accurate records reduce guesswork, support a more reliable report, and can highlight cost‑effective next steps.
What the Surveyor Will Look For
With past improvements documented, attention turns to what the surveyor will actually assess during the visit. Their focus is on visible, measurable features that affect how much energy the home needs to stay comfortable. They will move methodically from outside to inside, recording construction details, insulation levels, and heating systems.
Key areas typically reviewed include:
- Building fabric: Walls, roof, floors, windows, and doors, checking materials, glazing type, and draught potential.
- Insulation: Loft, cavity wall, solid wall treatments, and any exposed pipe or tank insulation.
- Heating system: Boiler type, age, controls, radiators, and presence of thermostatic valves.
- Ventilation and air leakage: Extractor fans, trickle vents, and obvious draught sources.
- Lighting and renewables: Low-energy lighting, solar panels, heat pumps, or other installed technologies.
What Happens After the Survey
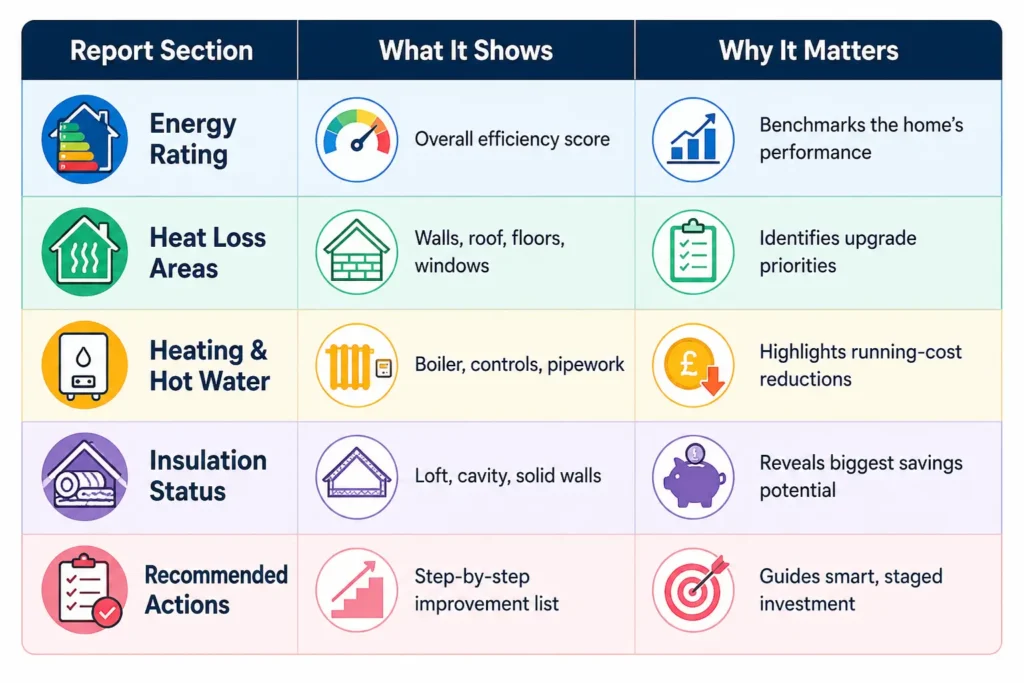
Once the survey is complete, the information collected is turned into a structured report that explains how the property performs and where it is losing energy. The homeowner typically receives this report within days, either digitally or in print. It outlines the current rating, main problem areas, and practical steps to improve comfort and reduce bills.
Key elements are often summarised as follows:
Frequently Asked Questions
Can I Stay at Home During the Entire Energy Efficiency Survey?
Yes, the homeowner can usually stay at home throughout the entire survey. They may be asked to provide access to all rooms, answer questions about energy use, and temporarily move belongings so assessors can inspect key areas.
How Long Does a Typical Home Energy Efficiency Survey Take?
A typical home energy efficiency survey usually takes between one and three hours. Duration varies with property size, accessibility of lofts or meters, and how many systems—heating, insulation, windows, and appliances the assessor needs to inspect.
Will the Survey Affect My Current Home Insurance or Mortgage?
The survey itself usually does not alter existing home insurance or mortgage terms. However, its findings might influence future premiums, coverage decisions, or lending considerations if major issues like structural problems, outdated wiring, or safety risks are uncovered.
Do I Need to Switch off Appliances or Electricity Before the Survey?
They usually do not need to switch everything off; most surveys are done with power on. However, the surveyor may ask for certain appliances, boilers, or heaters to be turned off briefly for safety and accurate readings.
Are Pets an Issue During the Energy Efficiency Survey Visit?
Pets are usually not an issue, but surveyors prefer them secured. Calm, contained animals prevent distractions, allow safe access to radiators, meters, and lofts, and reduce doors being left open while the assessor moves equipment and inspects rooms.
Conclusion
By following this simple checklist, homeowners can help the energy efficiency survey run smoothly, minimise delays, and guarantee accurate results. Clear access, organised documents, and honest notes on issues like damp or recent improvements all support a thorough assessment. With a clearer picture of the property’s performance, it becomes easier to plan cost‑effective upgrades, reduce energy bills, and create a more comfortable, efficient home once the survey findings are received.